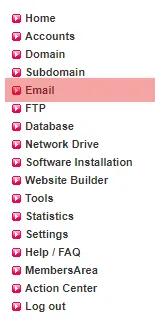
Email address, autoresponder, forwarding: How to create an email account
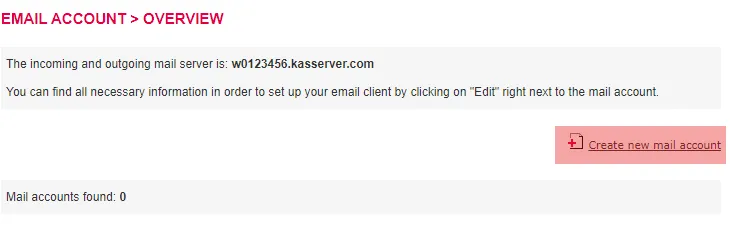
Step 2:

Step 3:

Step 4:

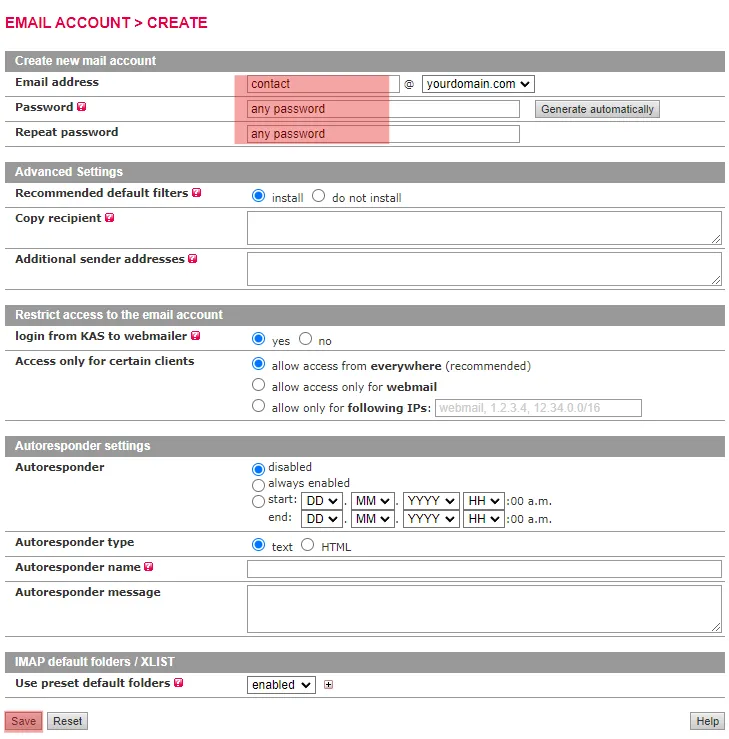
Email address: The desired alias of your email address. In this tutorial it's "contact". Leave this field blank in order to create a catch-all account. Then all emails will be received which have been sent to email addresses of your domain that don't explicitely exist in your KAS panel. We usually advice against catch-all accounts, since it is very vulnerable to spam.
Password: Determine the desired password here. It should at least consist of 10 characters and 30 characters max. Due to security reasons you should not determine passwords that are equal to the login name or to another password. You also never should use names, cities or dates of birth as password. If you click on "Generate automatically", a random password will be generated. In that case leave the password fields blank.
Recommended default filters: With the creation of an email account you can also directly activate the recommended spam filters. Changes on the filter settings are possible at any time in the WebMail client.
Copy recipient: Here you can enter multiple email addresses to which a copy of all incoming mails should be sent. The email addresses must be separated by comma.
Additional sender addresses: Here you can enter external email addresses (e.g. Yahoo, Gmail) which are also allowed to send emails using this email account.
It's also possible to restrict access to the email account.
Autoresponder: You can also activate and customize the autoresponder settings. An autoresponder automatically replies to any email that arrives in your inbox, e.g. when you are on vacation. You can specify a custom message.
Use preset default folders: If the XLIST option is enabled, your email client is forced to use the server's default IMAP folders. So every email client must use the same folders (e.g. inbox, sent, trash).
Finally, click the Save button.
Step 5:

Afterwards, you can access your email account via our WebMail or by using an email client (e.g. Outlook, Thunderbird).
In your email client you will be prompted for the data that is shown in the example image above:>.
Login: Benutzername/Kontoname
Password: Password
Servername: <your-login>.kasserver.com
"your-login" must be replaced with the username of your KAS panel!
The ports should be determined automatically, but in the case you need to determine it manually, here is an overview of all email ports:
110 - the default POP3 port to receive mails unencrypted or TLS-encrypted
143 - the default IMAP port to receive mails unencrypted or TLS-encrypted
995 - the POP3 port to receive mails SSL-encrypted
993 - the IMAP port to receive mails SSL-encrypted
25 - the default SMTP port to send mails unencrypted or TLS-encrypted
587 - the alternate SMTP port to send mails unencrypted or TLS-encrypted
465 - the SMTP port to send mails SSL-encrypted
Please note that your webhosting plan must support IMAP in order to use IMAP (some deprecated plans do not).
Search in support and FAQ

