 EN
EN
DNS: How to add an SPF-record
Step 1:
Using an SPF record you can specify which servers are allowed to send emails with your domain name.Log in to your KAS (Technical Administration) and click on Tools -> DNS Settings.
Edit the domain for which you want to change the DNS settings.
Step 2:
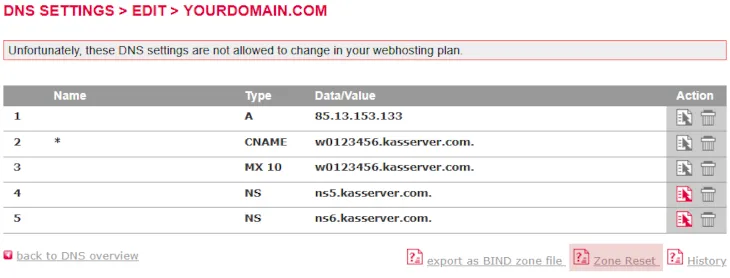
Attention: Zone Reset resets the DNS settings of the domain to the default and removes any additional entries.
Step 3:
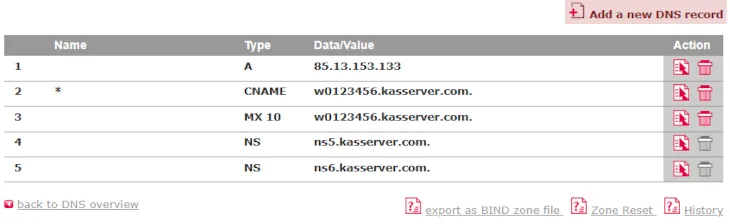
If no SPF record has been created yet, click on Add a new DNS record.
Step 4:
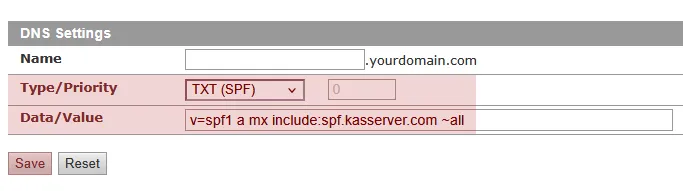
The Name field remains blank. The Type is TXT (SPF). The Priority remains 0. Then enter the desired parameters in the Data field.
Click the Save button to apply the new entry.
Step 5:
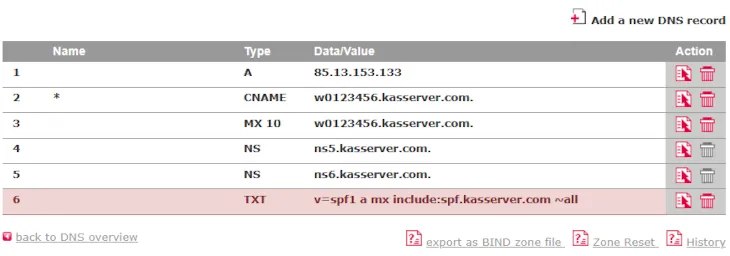
Step 6:
SPF syntax explanations:The SPF version is specified at the beginning of the SPF record with v=. So far, there is only spf1. Directives are then usually specified. These consist of an optional qualifier and a mechanism.
qualifiers:
+ for a PASS result. It specifies authorized senders. The email will therefore be accepted. This qualifier is also used by default if no qualifier is explicitly specified.
- for a FAIL. It specifies unauthorized senders. The email will therefore be rejected.
~ for a SOFTFAIL. It specifies unauthorized senders. The email will be accepted anyway, but can be marked as spam.
? for a NEUTRAL result. Senders whose validity cannot be determined and that have to be accepted. The email will therefore be delivered.
common mechanisms:
a The A-/AAAA record of the queried or explicitly specified domain.
mx The MX record of the queried or explicitly specified domain.
ptr The PTR record of the queried or explicitly specified domain.
ip4 The IPv4 address or the IPv4 subnet that is allowed to send emails.
ip6 The IPv6 address or the IPv6 subnet that is allowed to send emails.
include SPF query of the specified domain. The domain should have a valid SPF record.
all Matches always
As far as an argument for a mechanism should be handed over, it must be divided by a colon character.
Example:
v=spf1 a:mail.example.org -all
Search in support and FAQ